
Tying Tools
 Fly Tying is a whole world of handy tools!
Rocky River Trout Unlimited has tools that are supplied for six (6) beginners and may add more sets if aware of a greater number of beginners for an upcoming class. But at some point you will want your own tools for tying flies. The list of tools here is a basic list from of all the tools available to a fly tyer. This is a list that will get you started comparing and shopping. Many tyers even use found tools, or home-made tools, to complete a given task. Bcreative and shop craft stores and sewing sections in addition to fly shops. You do not need the absolute best tools to get started but high quality and long lasting functionality are often not inexpensive. Recommended are tools that are somewhere in between top-of-the-line and the bottom. You do not want to be discouraged so find tools that are comfortable for you. Do try out various tool designs for a given too prior to purchasing any expensive tool. Here is the list of most frequently used tools and a short description of each:
Fly Tying Bench and Fly Tying Storage: A fly tying bench or desk is a wonderful addition to your tying tools, but not a necessity. A tying bench will give you a nice, and neat, place to keep all of your tying materials and tools. If you are short on space and a tying bench is not really what you are looking for, a portable Fly Tying Bench that allows you to tie on any table or even on your lap may be the most useful. Fly Tying Storage is a necessity. We suggest you standardize on a few 3700 size plastic boxes of various depths and number of dividers. The set of boxes can be expanded with virtually any compartment configuration needed, may be stacked and bound together with two (2) long web straps will hold everything for transporting. The compartments or additional zip bags may be used to separate materials. The stack of boxes will easily store in a safe place until you are ready to tie.
Vise: A fly tying vise is a clamp. Once your hook is securely clamped into place in the vise, you can then begin to wrap the material onto the hook while it is held firmly in place. The main aspect in selecting a vise would be the ability to hold a hook securely. There is not a need for the beginner to purchase a high-end vise, save that money to purchase materials because a simple vice is all you will need to get started. Most tyers eventually purchase a high-end, rotary vise and keep their simple vice for a portable tying kit.
Bobbin: The Bobbin is required to hold the spool of thread. It will keep a certain amount of tension on the thread while wrapping the fly. Also, the bobbin will hang from the hoook while tying. The weight of the bobbin will keep the thread from unwrapping while you prepare the material for the fly.
Bobbin Threader or Dubbing Loop: A dual purpose tool. It is about 6″ in length with a short handle and a piece of looped wire attached to it. First it will allow you thread the spool of thread through the tiny neck of the bobbin. Simply insert the threader through the neck of the bobbin, then put the thread through the loop and pull it back through the neck of the bobbin pulling the thread along with it. Secondly, it can be used as a dubbing loop tool. A dubbing loop is a section of looped thread that is secured on one end and spun to create a section of thread spun with dubbing material, usually to create the body of a fly.
Bodkin or Dubbing Needle: A bodkin, also sometimes referred to as a dubbing needle, is simply a heavy needle inset into a comfortable handle. Bodkins are used to apply cement, free tied down hackle fibers and pick out other bound down fibers.
Hackle Gauge: A hackle gauge is a small gauge used to measure the length of the hackle. It does sound simple, but the proper proportions are important. This gauge will tell you if the hackle you have chosen is the right size for the hook you’re tying with.
Hackle Pliers: Hackle pliers will help wind materials around the hook. There are many different styles of hackle pliers. Look for one that has a firm grip while not to firm to damage or tear the materials.
Hair Stacker: A hair stacker aligns the tips of hairs to be tied onto the fly. Hair is inserted into the stacker and tapped until the tips are all aligned. Again, there are many sizes and styles to choose from. Your local fly shop can help you get started with the proper hair stacker.
Half Hitch Tool: Half-hitch tools are slender metal cylinders with holes of different sizes at each end. Usually they come in packages of three so that the tyer ends up with six different sizes of holes with which to work. To use the tool you first match the size of the hole in the end of one of the tools to the size of the hook eye and then lay the tool on top of the thread, twist the thread around the tool once, and with the tool up against the eye, slide the thread off onto the hook to make the half-hitch.
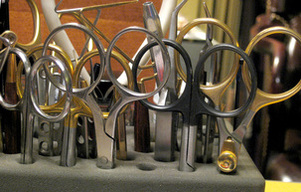
Scissors: A very important tool. Many tyers will have a few different pairs of scissors when tying. A good pair will be needed as you’ll be using them a lot. The second pair is handy to cut through heavy material such as wire and floss, save your good pair for the fine cutting. Remember, an inexpensive pair of scissors will only stay sharp for so long. Be sure you get the scissors that will hold up to your tying.
Tweezers: This is just one of those tools that can make tying easier. Depending on your needs tweezers can be used to pick up any material. Just as well, they can assist when your material on the hook is not in the exact place you’d like and your fingers are all thumbs.
Whip Finisher: A whip finisher allows you to finish a tied fly with a self-sealing knot called the whip finish. Before this tool was introduced this knot is completed by hand, which for some was very difficult. This tool can be tricky to learn, but once you have the hang of it, your whip finishes will be simple and quick. This is a tool that has many designs with some that more difficult for some tyers to use.
_____________________________________________________________________________________________________________________
Many of the descriptions above were provided by the Seth Green Trout Unlimited Chapter, Rochester, NY website.
Vise: A fly tying vise is a clamp. Once your hook is securely clamped into place in the vise, you can then begin to wrap the material onto the hook while it is held firmly in place. The main aspect in selecting a vise would be the ability to hold a hook securely. There is not a need for the beginner to purchase a high-end vise, save that money to purchase materials because a simple vice is all you will need to get started. Most tyers eventually purchase a high-end, rotary vise and keep their simple vice for a portable tying kit.
Bobbin: The Bobbin is required to hold the spool of thread. It will keep a certain amount of tension on the thread while wrapping the fly. Also, the bobbin will hang from the hoook while tying. The weight of the bobbin will keep the thread from unwrapping while you prepare the material for the fly.
Bobbin Threader or Dubbing Loop: A dual purpose tool. It is about 6″ in length with a short handle and a piece of looped wire attached to it. First it will allow you thread the spool of thread through the tiny neck of the bobbin. Simply insert the threader through the neck of the bobbin, then put the thread through the loop and pull it back through the neck of the bobbin pulling the thread along with it. Secondly, it can be used as a dubbing loop tool. A dubbing loop is a section of looped thread that is secured on one end and spun to create a section of thread spun with dubbing material, usually to create the body of a fly.
Bodkin or Dubbing Needle: A bodkin, also sometimes referred to as a dubbing needle, is simply a heavy needle inset into a comfortable handle. Bodkins are used to apply cement, free tied down hackle fibers and pick out other bound down fibers.
Hackle Gauge: A hackle gauge is a small gauge used to measure the length of the hackle. It does sound simple, but the proper proportions are important. This gauge will tell you if the hackle you have chosen is the right size for the hook you’re tying with.
Hackle Pliers: Hackle pliers will help wind materials around the hook. There are many different styles of hackle pliers. Look for one that has a firm grip while not to firm to damage or tear the materials.
Hair Stacker: A hair stacker aligns the tips of hairs to be tied onto the fly. Hair is inserted into the stacker and tapped until the tips are all aligned. Again, there are many sizes and styles to choose from. Your local fly shop can help you get started with the proper hair stacker.
Half Hitch Tool: Half-hitch tools are slender metal cylinders with holes of different sizes at each end. Usually they come in packages of three so that the tyer ends up with six different sizes of holes with which to work. To use the tool you first match the size of the hole in the end of one of the tools to the size of the hook eye and then lay the tool on top of the thread, twist the thread around the tool once, and with the tool up against the eye, slide the thread off onto the hook to make the half-hitch.
Scissors: A very important tool. Many tyers will have a few different pairs of scissors when tying. A good pair will be needed as you’ll be using them a lot. The second pair is handy to cut through heavy material such as wire and floss, save your good pair for the fine cutting. Remember, an inexpensive pair of scissors will only stay sharp for so long. Be sure you get the scissors that will hold up to your tying.
Tweezers: This is just one of those tools that can make tying easier. Depending on your needs tweezers can be used to pick up any material. Just as well, they can assist when your material on the hook is not in the exact place you’d like and your fingers are all thumbs.
Whip Finisher: A whip finisher allows you to finish a tied fly with a self-sealing knot called the whip finish. Before this tool was introduced this knot is completed by hand, which for some was very difficult. This tool can be tricky to learn, but once you have the hang of it, your whip finishes will be simple and quick. This is a tool that has many designs with some that more difficult for some tyers to use.
_____________________________________________________________________________________________________________________
Many of the descriptions above were provided by the Seth Green Trout Unlimited Chapter, Rochester, NY website.
The Basic Materials in Fly Tying
Rocky River Trout Unlimited collects $10 from each participant in each tying class and uses these funds to re-supply materials that are used in the classes. The following is a general introduction to the basic materials that are used for tying fly patterns for trout. A well stocked fly shop will generally have the materials you need for a given pattern. Some materials may also be found in sewing centers and craft stores.
Hooks: A fly pattern recipe usually denotes the size range and specific type of hook that is best suited for the resulting fly. Hooks are available from a number of manufacturers with each one producing a range of sizes from a extremely small size 32 up to an extremely large size 14/0, appropriately varying in size range for each type of hook they choose to make. Most trout flies use small hooks down to size 18 to large hooks up to size 2. Fly patterns used on spring creeks and tailraces use smaller fly sizes realistically down to size 24 and up to size 16. Saltwater flies use stainless steel hooks that resist rust down to size 4 and up to size 5/0. Dry flies use a finer gauge and even hollow metal type of hook. Wet flies use a heavy gauge hook that sinks easily. Streamer flies use an extra long shank hook. Types of hooks vary with eyes that turn up, turn down or are straight in line with the shank. Hooks are available with different bends, curved shanks, with and without a barb and even in a number metallic colors. Substitution tables among manufacturers may be consulted to select a comparable hook should you not have what the recipe denotes.
Thread: The durability of the fly depends on a strong thread wrap tied well to hold each material in place. Nylon thread is most commonly used but there are tying appications where gel spun or even unbreakable kevlar is used. The size or diameter of the thread used is proportional to the hook size of the fly being tied. Most size 10 to size 14 trout flies are tied with 3/0 (140 denier)or 6/0 (70 denier) thread. Larger sized flies are tied with 210, 270 and even 400 denier. Smaller sized flies are tied with 8/0 (40 denier), 10/0, 12/0 even as small as 14/0 which is appropriately labeled "spider web" as it is very small and unfortunately not very strong. Tying thread is available in many colors as well as black and white. Fly pattern recipes generally denote a specific size, color and type of tying thread.
Head Cement: One a fly is completed and the thread is tied off with a whip finish, head cement has traditionally been used to seal and secure the final wraps of thread. Some fly tyers prefer to use stronger adhesives such as clear nail polish or even superglue. Keep in mind the hook eye will draw any adhesive in and will need to be cleared with a needle either after drying or later on the stream when selected for use.
Wire: Metallic gold, silver or copper colored wire has long been used to over-wrap the body materials in many fly patterns as a means to create a rib-like abdomen effect as well as giving the fly even more durability. Today wire is available in a number of metallic colors as many new fly patterns call for a specific color of wire for ribbing. The size or diameter of the wire used is proportional to the hook size being tied. Most size 10 to size 14 trout flies are tied with 20-24 gauge wire. Larger sized flies are tied with 14-20 gauge wire and smaller flies are tied with 24-32 gauge wire. Lead wire, actually a lead substitute alloy wire since lead is considered eco-unfriendly, or many more wraps of any wire may be used to wrap an underbody that adds a more realistic shape and also weight to wet flies, nymphs and streamers for improved sink rates.
Beads: Beads revolutionized the variety wet fly, nymph and streamer fly patterns. Any original fly pattern may also be tied with plastic, glass or metallic colored bead head that adds accent, weight and reflective flash to the fly pattern. Most anglers and many biologists believe the bead mimics an air bubble, other simply believe the fish may not notice the bead much like they do not notice the bend and point of the hook. The size or diameter of the bead used is proportional to the hook size of the fly being tied.
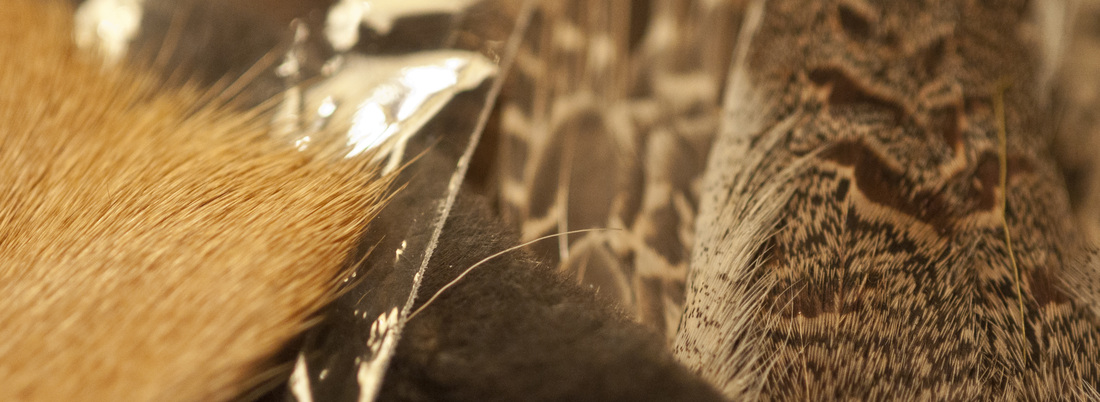
Feathers: The stiffness of the feathers from a preserved rooster necks make excellent hackle for high floating dry patterns and they are available in a variety of natural colors. Feather sizes from size 32 up to size 2 are all found on the same cape from a single rooster. Hen neck feathers are softer and make excellent collars for wet flies and legs for nymphs. Since a full cape of feathers for dry hackle is rather expensive and takes forever to use up, feather suppliers have been offering 1/2 and 1/4 capes that are less expensive yet more profitable for both the supplier and the fly shop. In the past several decades, suppliers have genetically bred very long, stiff saddle hackle feathers that may be used to tie multiple flies per feather. A fly tyer is able to buy a pack of saddle hackle feathers that specifically tied up to 100 flies of the same hook size. Feather fibers are used for the tail, legs and wing cases. Feather quills and biots are used for ribbed bodies. Flank feathers, hackle tips and Cul de Canard (CDC feathers and puffs are used for wings on small, delicate emergers and dun fly patterns. Marabou feathers are used for busy tails and wings on streamers. Herl is used for bodies and legs. The use of feathers in natural colors, dyed colors and even the new UV florescence - UV reflectence dyed colors in fly patterns appears to be endless.
Hair: The stiff, strong and relatively long hair from large animals such as moose and bear are used for the tail, legs and even to make small ribbed bodies. The unsinkable, hollow hair from elk and dear are used for tails, legs and wings of roughwater dry flies. Deer hair specifically is spun and packed around a hook shank to make large, very buoyant bodies and the bulky heads for muddlers, sculpin and hopper fly patterns. Both naturals and dyed colors of bucktail hair is used extensively in tying very durable streamers. Both natural colors and dyed colors of hair from smaller animals such as rabbit, opossum, squirrel and fox are used in blending dubbing for bodies.
Synthetic Materials: Decades ago, synthetic materials primaily consisted of shiny, colorful flosses, colorful cotton or synthetic threads and yarn, colorful chenille, matallic mylar tinsels and tubing, rubber or latex strips and sheets and new evolving materials like swannadaze ribbing.It seemed like a great variety at the time. Today, synthetic materials include artificial hackle, artificial hair that can be virtually any length, artificial fur zonker strips in color patterns, braids and micro braids, flash and mirco flash, gummy sheets, colorful razor thin, very dense foam and sticky-back foram for bodies and wings, pre-cut foam bodies, pre-formed coneheads, dumbell eyes, sticky back eyes, pre-formed hopper legs, preformed extended bodies and the list goes on and on. Synthetics has taken fly tying to a new level of creativety with fly pattern designs at the tying bench.
_________________________________________________________________________________________________________________
Rocky River Chapter of Trout Unlimited - 2014
Rocky River Chapter of Trout Unlimited - 2014