
Tan Klinkhamer
|
Ginger Klinkhamer
|
Fly of the Month 04.20
Imagine the trigger mechanism in a trout’s brain when they spot an insect abdomen and tail hanging below the surface of a suspended mayfly. A nymph or pupa rises to the surface to hatch and go airborne to find a mate to ultimately reproduce. However, it takes a little time to clear the shuck, get the wings deployed, dried and ready for flight. While the insect is laboring through this stage of change or emerging, the inset is highly vulnerable. The trout see the abdomen and tail hanging just below the surface and take advantage of this moment of preparation for flight. Scientists and anglers describe the insect as an emerger. BAM! The emerger had little chance and no future with the strike. Thus, insects hatch in numbers which ups the odds that some survive to continue the brood and the species. Its nature’s way!
Klinkhammer
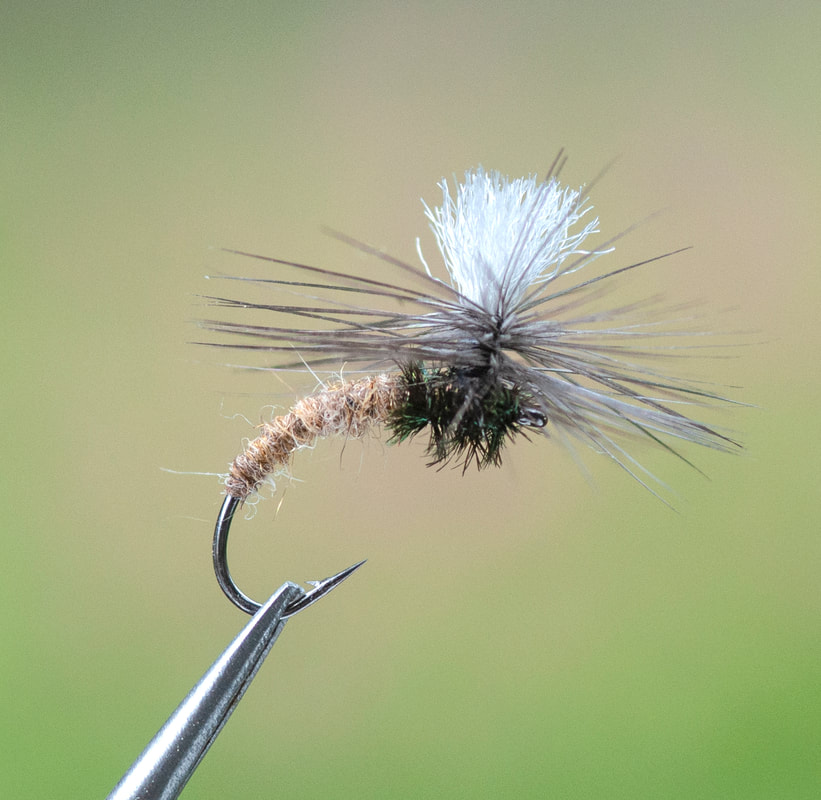
One of the best known, modern emerger fly patterns used to catch trout and grayling is the Klinkhammer. It was developed by Hans van Klinken, a Dutch angler, in the early 1980s. Klinken was an avid grayling angler who sought to improve the parachute fly pattern design by bending the hook. Today, some manufacturers sell a Klinkhammer style hook, specifically for this fly pattern. The original fly pattern was tied with a light tan body to imitate an emerging caddisfly and called the LT Caddis.
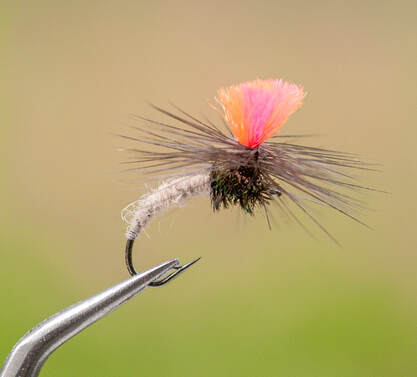
The Klinkhammer is a parachute fly pattern but is uniquely tied with the curved abdomen that hangs down through the surface. A brightly colored foam, hair or poly wing post provides high visibility to the angler unlike many other emerger fly patterns that tend to disappear in the surface tension.
The Klinkhammer fly pattern is sometimes referred to as an ‘iceberg fly” as 90% of the fly is below the water line.
Over time anglers discovered that the fly pattern is highly effective in still water as well.
Klinkhammer
Fly of the Month 04.20
Tom Adams and Alen Baker
References:
Internet; Jack McNeary RRTU Beginner’s Fly Tying Class
Imagine the trigger mechanism in a trout’s brain when they spot an insect abdomen and tail hanging below the surface of a suspended mayfly. A nymph or pupa rises to the surface to hatch and go airborne to find a mate to ultimately reproduce. However, it takes a little time to clear the shuck, get the wings deployed, dried and ready for flight. While the insect is laboring through this stage of change or emerging, the inset is highly vulnerable. The trout see the abdomen and tail hanging just below the surface and take advantage of this moment of preparation for flight. Scientists and anglers describe the insect as an emerger. BAM! The emerger had little chance and no future with the strike. Thus, insects hatch in numbers which ups the odds that some survive to continue the brood and the species. Its nature’s way!
Klinkhammer
One of the best known, modern emerger fly patterns used to catch trout and grayling is the Klinkhammer. It was developed by Hans van Klinken, a Dutch angler, in the early 1980s. Klinken was an avid grayling angler who sought to improve the parachute fly pattern design by bending the hook. Today, some manufacturers sell a Klinkhammer style hook, specifically for this fly pattern. The original fly pattern was tied with a light tan body to imitate an emerging caddisfly and called the LT Caddis.
The Klinkhammer is a parachute fly pattern but is uniquely tied with the curved abdomen that hangs down through the surface. A brightly colored foam, hair or poly wing post provides high visibility to the angler unlike many other emerger fly patterns that tend to disappear in the surface tension.
The Klinkhammer fly pattern is sometimes referred to as an ‘iceberg fly” as 90% of the fly is below the water line.
Over time anglers discovered that the fly pattern is highly effective in still water as well.
Klinkhammer
Fly of the Month 04.20
Tom Adams and Alen Baker
References:
Internet; Jack McNeary RRTU Beginner’s Fly Tying Class
Klinkhamer
Hook : Klinkhamer style hook size 10,12,14,16,18,20
Thread : Veevus 14/0 Black
Abdomen: Tan dubbing or any matching color to the insect
Thorax : Peacock Herl or dubbing
Hackle : Rooster dry, Dark Dun or cream
Wing post : Antron, light dun, white, or hi viz antron
Directions :
Hook : Klinkhamer style hook size 10,12,14,16,18,20
Thread : Veevus 14/0 Black
Abdomen: Tan dubbing or any matching color to the insect
Thorax : Peacock Herl or dubbing
Hackle : Rooster dry, Dark Dun or cream
Wing post : Antron, light dun, white, or hi viz antron
Directions :
- Mount the hook in the vise
- Begin thread wraps at the eye and make tight touching turns to the center of the flat portion of the hook shank and let the bobbin hang.
- Select a four inch section of antron. Double and cut in half, keeping the ends aligned. Use this to make the wing post. Slide the antron under the hanging thread on the far side of the hook and holding each side of the antron, lift and place the antron in position. Make two wraps of thread to hold the wing in place and then lifting the antron straight up begin making thread wraps around the base of the wing post beginning the vertical of the post. Continue wraps up the post making eight or ten turns up before returning the thread to the base of the post. Advance the thread to the bend of the hook approximately opposite the hook barb.
- Dub the thread and begin making a thin taper to the flat portion of the hook and let the bobbin hang.
- Select a hackle that has barbs sized to the hook. Strip a quarter inch or so from the hackle and tie in by the tip at the base of the wing post. Holding hackle in a vertical begin wraps of thread up the wing post binding in the hackle. Return the thread in wraps down the post and make thread turns to where you stopped the dubbing. Let the bobbin hang.
- Select two peacock herls and tie in immediately in front of the dubbing. Wrap the herl forward to the hook eye in tight touching turns. Tie off the herl at the wing post and let the bobbin hang. Trim away any waste herl.
- Begin wrapping the hackle down the wing post and once you reach the bottom, take the thread around the wing post at its base and trap the hackle with three turns. Trim the waste hackle. Make three whip finish knots with the thread at the wing post base and trim the thread.